
I decided to do some calculations on the costs of repairing my cabinet. If I was able to borrow a router the cut out slits in my existing cabinet for t-molding and patching, it would still cost me around $20 just to by the correct slot-cutting bit. I was still unsure as to the quality of my product if I followed this approach. If I sawed off the bottom of the side panels and re-attached new ones would the seam be noticeable? Would the paint absorb into the two materials differently? These were burning questions. I finally decided late Friday night that I would try to talk the guy selling his cabinet into lowering the price to $20. If I could do that, and if his cabinet still had all the internal shelves and screw holes that I needed, by jove, I would purchase it, clean it up, and move my electronics over to it!
Saturday morning I thoroughly inspected his cabinet and realized that there was something different. The shelves inside his cabinet were screwed or nailed into the sides while many of mine sat in slots that had been routed into the sides of the cabinet, making their removal impossible without tearing a side off. Furthermore, his sides were made from plywood while mine were made from particle board.
Then it dawned on me.
My cabinet must have had more extensive water damage than I had hitherto anticipated. The sides of my cabinet were phonies! Bulking particle board impostors that had made moving the cabinet up and down stairs a laborious and sweaty task. Now that I knew the truth I would be a fool to pass up on buying his cabinet. I was able to talk him down to $25, borrow my mother-in-law's van and retrieve the cab. DK2 joined DK1 in my garage for my Frankenstein experiment.


So long, you hairy ape! I peeled and peeled and peeled.
Then had to resort to Goo Gone with an SOS pad to remove the sticky residue left behind.


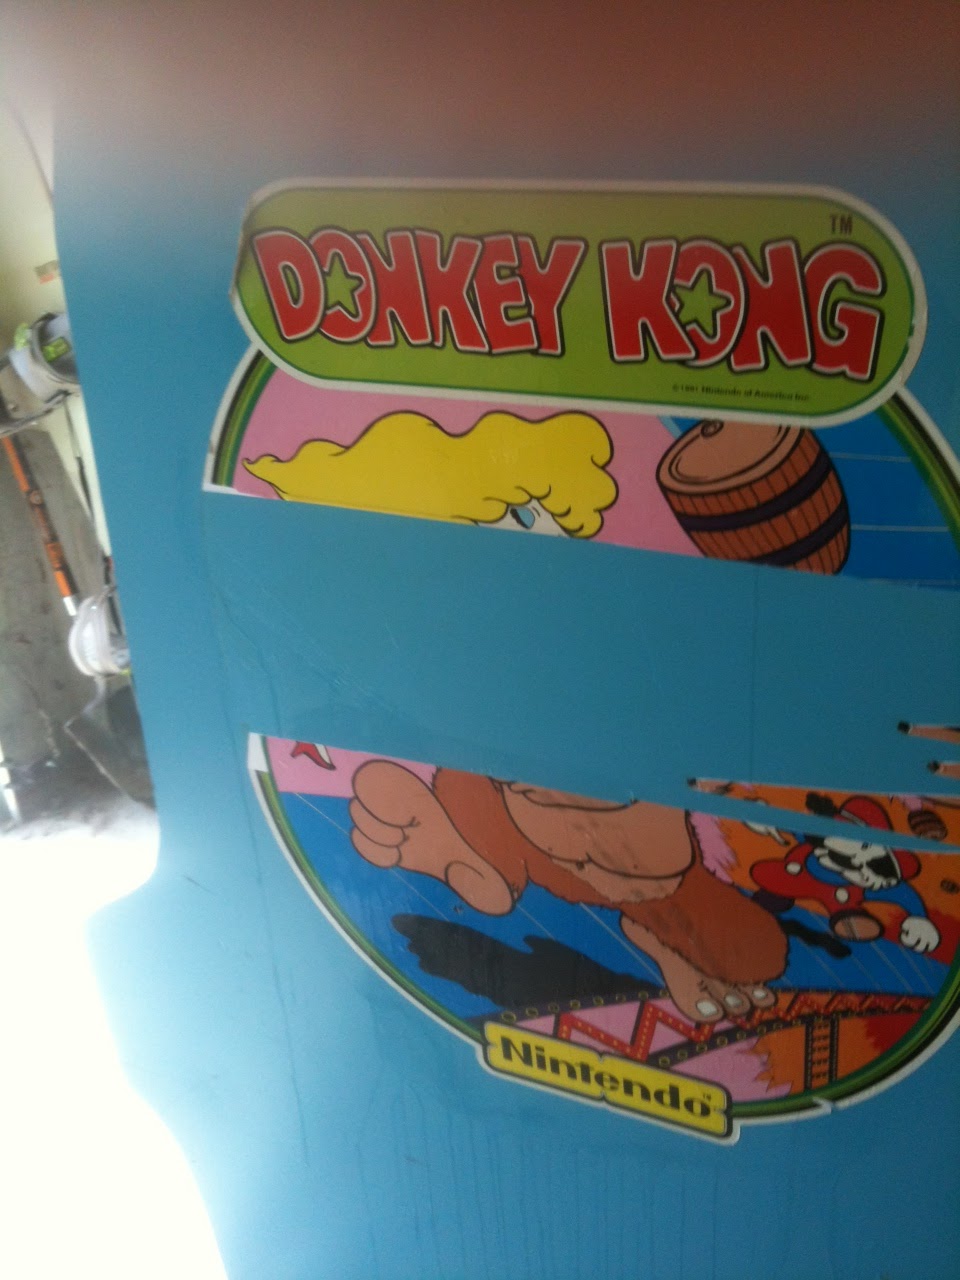
I also had to take off the front sticker. You can also see the two holes and wear from the security bar.


Someone had used duct tape to keep the back door on. Nothing a sander won't remove.

I gave the cabinet a good wash-down and got to work on it with my electric sander and some medium grain paper, creating billions of blue dust particles in the air. After I scrubbed it down again I was ready for the Bondo. I had never used the stuff in my life but I had heard the horror stories—mostly revolving around the revolting smell of the stuff. The stories turned out to be true. It is like a combination of all of the most potent vileness, from magic markers to rubber cement to gasoline to the 10th power. After mixing the Bondo with the hardener you have 3-4 minutes to apply before it solidifies beyond use. After a moderately quick learning curve I was Bondo-ing that bad boy like there was no tomorrow. I had to do about three rounds of Bondo with sanding intermissions before I got it ready for painting. I probably killed a few brain cells in the process too.


Special thanks to my wife for putting up with my shenanigans all Saturday. When I picked my nose I pulled out little Smurf boogers. I probably should have worn a dust mask.
Now we have a true Donkey Kong cabinet that is patched up and ready for priming. I will be brushing on a few coats of primer interspersed with some fine grain sanding to keep the paint level. I need to pick up some Donkey Kong powder blue color. I want to use Sherwin-Williams. I will definitely not be using any of that Behr crap for this. I found a paint code online:
Sherwin-Williams Semi-gloss, Latex paint
BAC COLORANT 02—32—64—128
W1 White 08—03—01—01
G2 New Green 00—26—01—00
L1 Blue 02—23—00—00
R3 Magenta 00—10—00—01
I haven't tried it out yet, but the results looked good on a blog I read so I think I'll try it out for myself.
No comments:
Post a Comment