Sunday, September 16, 2012

Extreme Makeover

When I last posted two weeks ago, I had just sanded down and patched up the beast using Bondo. Once that was done I used up my Labor Day Monday to tape up the cabinet in preparation for the paint. You can locate the patched up areas by the gray color. It looks like this cab went through a prize fight at this point. Don't worry—it's about to get prettier.


I bought some Sherwin Williams paint to the Donkey Kong powder blue specifications and I picked up some primer as well because I wanted to make sure I started my blue paint on a clean base of primer. If I painted blue directly onto the bondo and old paint the paint would sit differently on the two materials. I poured out my primer and went to town, uneasy of the ominous storm clouds heading my way. After two coats of primer it was starting to look like Space Ghost.


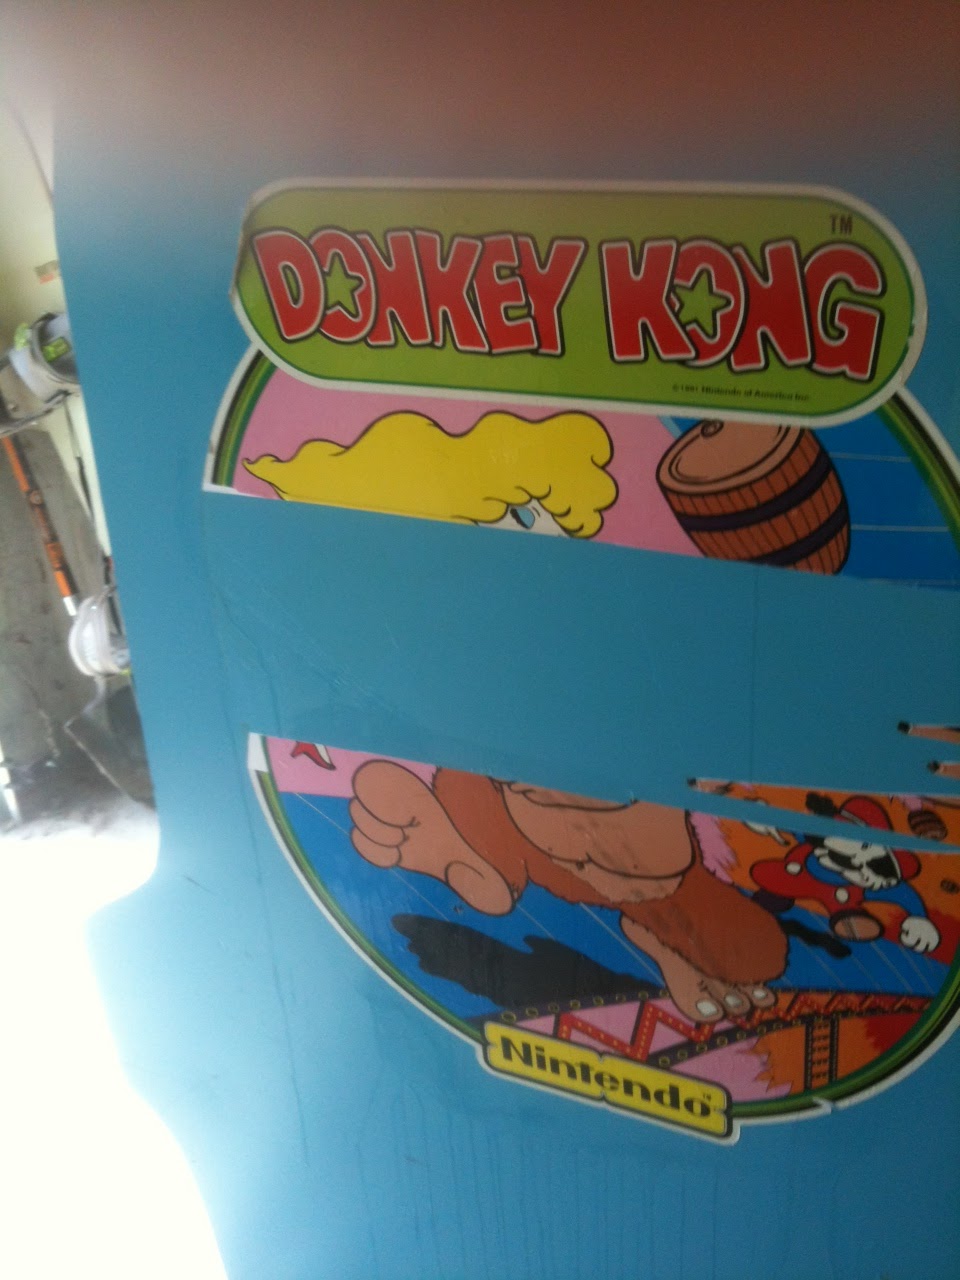
I was able to manage a coat of blue that evening in the garage, during the rain. Sorry for the somewhat blurry images. I've been using my cell phone camera for convenience. See, now we're getting somewhere:


I used rollers for the coats of paint. The surface would have been smoother if I had used a paint gun, but I didn't want to spend more money on extra equipment, rentals, etc. so I made due. The plan was to sand it with a fine sand paper between coats. I ended up getting carried away and putting three coats of blue onto the cabinet without sanding. When I went back to sand it I realized my mistake. With each consecutive coat of paint put on by a roller the surface gets more and more rough! I ended up sanding and sanding the surface with both electric and hand sanders to bring the surface smooth again. I should have either hand sanded between coats like I had planned or used a sprayer. Oh well. Lesson learned.


On Friday night I took the tape off and the next step was to replace the base with the one I had constructed a few weeks ago for my older cab (DK1). DK2 needed a new base as well. It was missing the front 1x4 of the square. Using a flathead screwdriver as a lever I was able to rip out the old boards. There were all sorts of goodies in there—cobwebs, grime, spider egg sacks, and other unidentified insect creations.


I now had about 20 staples to remove from the bottom. I pulled out about 8 when I realized that some of the staples were laying underneath boards that were screwed into the inside of the cabinet. I aborted my fruitless plan and instead hammered the staples flat to the surface. 

I measured and screwed my new base on from the inside. Now it was time to do some touchups with the blue and then sand and tape it off in preparation for the black paint.


After a couple coats of black it was looking great. I used the same Behr primer/paint that I had used when I painted the base. I also picked up some black, rust-resistant spray paint for the metal frames and coin door. The frames rest above and below the marquee to help keep it in place. These turned out really good.


I took off the tape and admired my work. It's amazing what a difference new paint makes. It will look even better when the t-molding is installed.


I replaced the serial number plaque. It looks nice against the new black paint.


Then I couldn't help myself. I had to move my power transformer, speaker, and wiring into the new cabinet. Since the Japanese Sanyo 20EZ monitor and the light run off of Japanese 100 volts and America uses 120 volts, this little unit converts the American voltage to run the Japanese equipment. Charming.


The speaker. There are several green wires that are grounded to random screws throughout the cabinet. I made sure to take pictures of the proper position of things before I ripped everything out so I wouldn't forget.


I screwed in my Japanese light fixture and fed the wire back through the back to plug into the power transformer. 


Then I decided to test the power, just to make sure everything was working properly. I hooked up the wiring and flipped the switch. It's alive! Alive!!! You'll also noticed I placed the hardware for the top and bottom marquee braces that I had repainted.


It's starting to look really nice and I can't wait to move it back into my basement, where I will work on the rest of the small pieces. It's really going to look good once I install the t-moldings on the sides of the cabinet again. That's probably the next step, as well as replacing the power cord, which has exposed wires in several places. I'll need to buy a new cord, strip the wires at the end, and splice them into the Molex connector.

Sunday, September 2, 2012

Phony Kong

A couple weeks ago another Donkey Kong cabinet was posted in the classifieds. The owner was parsing out each part of the cab to sell individually and the wooden cabinet was listed at $35. This was a tempting proposition, as purchasing this cabinet would cut down on the time it would take to restore my cabinet considerably. After looking at his cabinet I decided to stay with my cabinet and try to fix the side panels. Since then I have been back and forth about the idea of buying it.

I decided to do some calculations on the costs of repairing my cabinet. If I was able to borrow a router the cut out slits in my existing cabinet for t-molding and patching, it would still cost me around $20 just to by the correct slot-cutting bit. I was still unsure as to the quality of my product if I followed this approach. If I sawed off the bottom of the side panels and re-attached new ones would the seam be noticeable? Would the paint absorb into the two materials differently? These were burning questions. I finally decided late Friday night that I would try to talk the guy selling his cabinet into lowering the price to $20. If I could do that, and if his cabinet still had all the internal shelves and screw holes that I needed, by jove, I would purchase it, clean it up, and move my electronics over to it!

Saturday morning I thoroughly inspected his cabinet and realized that there was something different. The shelves inside his cabinet were screwed or nailed into the sides while many of mine sat in slots that had been routed into the sides of the cabinet, making their removal impossible without tearing a side off. Furthermore, his sides were made from plywood while mine were made from particle board. 

Then it dawned on me.

My cabinet must have had more extensive water damage than I had hitherto anticipated. The sides of my cabinet were phonies! Bulking particle board impostors that had made moving the cabinet up and down stairs a laborious and sweaty task. Now that I knew the truth I would be a fool to pass up on buying his cabinet. I was able to talk him down to $25, borrow my mother-in-law's van and retrieve the cab. DK2 joined DK1 in my garage for my Frankenstein experiment.


DK2 still had some work to put into it, but considerably less, as the sides and their t-molding slots were in perfect condition. I still needed to patch two holes near the coin box, where someone had placed a security bar. There were six additional holes on the sides of the cabinet that I needed to fill in as well. Bondo would be my ally. After blowing and vacuuming out the cab, the first order of business, which would be regrettable, would be removing the existing side art.


So long, you hairy ape! I peeled and peeled and peeled.


Then had to resort to Goo Gone with an SOS pad to remove the sticky residue left behind. 


I also had to take off the front sticker. You can also see the two holes and wear from the security bar.


Someone had used duct tape to keep the back door on. Nothing a sander won't remove.


I gave the cabinet a good wash-down and got to work on it with my electric sander and some medium grain paper, creating billions of blue dust particles in the air. After I scrubbed it down again I was ready for the Bondo. I had never used the stuff in my life but I had heard the horror stories—mostly revolving around the revolting smell of the stuff. The stories turned out to be true. It is like a combination of all of the most potent vileness, from magic markers to rubber cement to gasoline to the 10th power. After mixing the Bondo with the hardener you have 3-4 minutes to apply before it solidifies beyond use. After a moderately quick learning curve I was Bondo-ing that bad boy like there was no tomorrow. I had to do about three rounds of Bondo with sanding intermissions before I got it ready for painting. I probably killed a few brain cells in the process too.


Special thanks to my wife for putting up with my shenanigans all Saturday. When I picked my nose I pulled out little Smurf boogers. I probably should have worn a dust mask.

Now we have a true Donkey Kong cabinet that is patched up and ready for priming. I will be brushing on a few coats of primer interspersed with some fine grain sanding to keep the paint level. I need to pick up some Donkey Kong powder blue color. I want to use Sherwin-Williams. I will definitely not be using any of that Behr crap for this. I found a paint code online:

Sherwin-Williams Semi-gloss, Latex paint
BAC COLORANT  02—32—64—128
W1 White                 08—03—01—01
G2 New Green        00—26—01—00
L1 Blue                     02—23—00—00
R3 Magenta             00—10—00—01

I haven't tried it out yet, but the results looked good on a blog I read so I think I'll try it out for myself.

Rebuilding the Base

Last Thursday was time to rebuild the black base of the cabinet. The only thing remaining on the bottom of the cabinet was a pair of rear wheels. My guess is that the black (originally plywood) base had seen some water damage and was removed. For some unknown reason the previous owners hadn't replaced anything on the bottom, causing the cabinet to tilt forward when resting on the floor. You can see some wear along the sides as a result.


I acquired some lumber to do the task and bought particle board to replace the sides while I was at it.


My awesome brother-in-law let me use some of his tools to saw the boards to the appropriate specifications and sand my two side pieces. I had a nasty run-in with the sander.


It's only a fleshwound! 


Let this be a lesson to you, kids. Always wear the appropriate safety equipment when operating dangerous machinery. When we were done, this is what the finished base looked like. It is made of pine 1x4s with corner pieces to give it more accurate 90° angles and added support. We sunk the screws and nails beneath the surface of the wood so I could putty everything in later and create clean sides. The boards are designed to be slightly taller than the wheels so the wheels sit above the floor when standing but touch the ground when you tilt the cabinet backwards.


After puttying in the holes and sanding, I painted the base black. Once finished, I had to pull 12 staples out of the base of the cabinet, which proved to be an arduous procedure. 

I stood the cab on my new base just to see how it looks. This profile also shows the wear that the side panels have seen, near the front.


The next step is sawing off the bottom of the side panels flush with the cab and using a router and biscuits to attach the new side pieces, then blending everything together.

Wednesday, August 22, 2012

Giving Life to an Old Gorilla

A month or so ago I came across a classified ad of someone selling his Donkey Kong arcade cabinet for $100. The cabinet was said to be in need of a couple of parts to get it working again, particularly a power transformer and a cap (capacitor) kit for the monitor. Naive to the technicalities of arcade cabinets, I hesitated on making a decision until I did more research. Unfortunately, this slowed down the process and someone else won the cabinet. I realized what a good deal it was a little too late and kicked myself ever since. I spent the following weeks reading up on the intricacies of arcade cabinet maintenance and trouble-shooting and my interest piqued at the idea of undertaking a restoration project.

Fast-forward to last week.

As I did my daily KSL listing search there it was—a Donkey Kong cabinet located in Tooele, Utah for $300. Not as good a deal as the previous, but enough to get me interested. The owner didn't know what was wrong with it. It had been sitting in his garage for two years, gathering dust. I talked him down to $150 over the phone and made my trek to Tooele after work on Wednesday night. After inspecting the unit I was able to talk him down to $130. On the drive home I wondered if I had made a bad decision. After all, I had no idea what was wrong but had some ideas on how to figure it out.

Upon arriving home I unloaded the cabinet and cracked open the sarcophagus. Ancient dust filled my lungs.


I vacuumed the cabinet out and gave it a good scrub down to remove the layers of dust. The t-moldings were cracked and brittle. The particle board sides were chipped and uneven. Graffiti adorned the sides. Apparently, someone had once believed it to be a "sexy beast".


The bottom was in disarray. The rear wheels were attached, but the rest of the base was missing. As a result, the particle board on the front of the unit was worn down.


The top and back needed some TLC. Luckily, the cabinet still came with the original serial number plate on the backside.


In short, I had my work cut out for me.

On the inside of the cabinet was a small bag of goodies—a coin catcher, some fuses, and unidentified metal trinkets. I decided to start of with the basics. I swapped the fuse out for one of the replacement fuses in the bag, plugged the machine in, and flipped the switched.

BVVVVTTTTT!!!!

Uh-oh! I hoped I hadn't just fried the PCB (micro-chip game board). I looked at the screen and it was blank. I looked back into to the guts of the beast. My friend glanced back at the screen and calmly said, "Oh Logan..."

I looked back and there it was. The demo screen showed little jump man Mario climbing ladders and leaping over barrels. My investment had just tripled. I had all working electronics! I could barely believe I wasn't dreaming. I never get that lucky in life. After my buddy twisted around the 30-year-old florescent bulb in started to flicker and BAM! it came to life. A miracle. This particular bulb was made in Japan and it is nigh impossible to get a replacement for it today. It still had the factory tape over the bulb and Japanese writing all over it. The monitor is the original 30-year-old Sanyo 20EZ. It has absolutely no screen burn-in.


I cleaned off the bezel glass and marquee and took another shot:


The electronics were easier than expected to get working. Now it was time to get to work on the body of the beast. I got to work planning my attack strategy.


Today I made a trip to Home Depot and picked up some supplies to initiate Phase 1: Rebuilding the Base Frame. Pine 1x4 boards to create the four sides, black paint to make it look perty, and some particle board for Phase 2. Tomorrow I will be cutting my boards at 45° angles to make a box, then screwing it into the bottom of the cabinet. 

The following is what I would like to do to restore this classic cabinet:
  • Rebuild the base and attach it to the bottom of the cab.
  • Saw off the bottom 1 1/2 inches on the sides that have been damaged and biscuit joint new bottoms on.
  • Scrub down the outside more thoroughly, Bondo in the cracks and chips, and sand it down.
  • Repaint the cabinet the DK light blue and black color.
  • Disassemble the control panel and thoroughly clean it out, clean the buttons, re-grease the joystick, and possibly place in a new score card reproduction.
  • Place new white t-moldings on the outside.
  • Repaint the coin door, get the coin slots to accept quarters again. Sand blast the metallic coin slots so they look shiny and new.
  • Plug in an additional chip that allows me to save high scores.
  • Replace the power cord with a non-frayed one.
  • Place a new cap kit on the monitor. The screen looks slightly distorted.
  • Replace the lock mechanism on the back. It looks like someone lost the key and resorted to screwing the door to the cabinet to keep it shut.